Replace Outer Door Window Seal How To
#1
 08-21-2013, 08:20 PM


I recently replaced the outer door window seal on my 1993 coupe. I found a good narrative description detailing this repair but didn't see any with photos. Here are the steps from my repair on the driver's door.
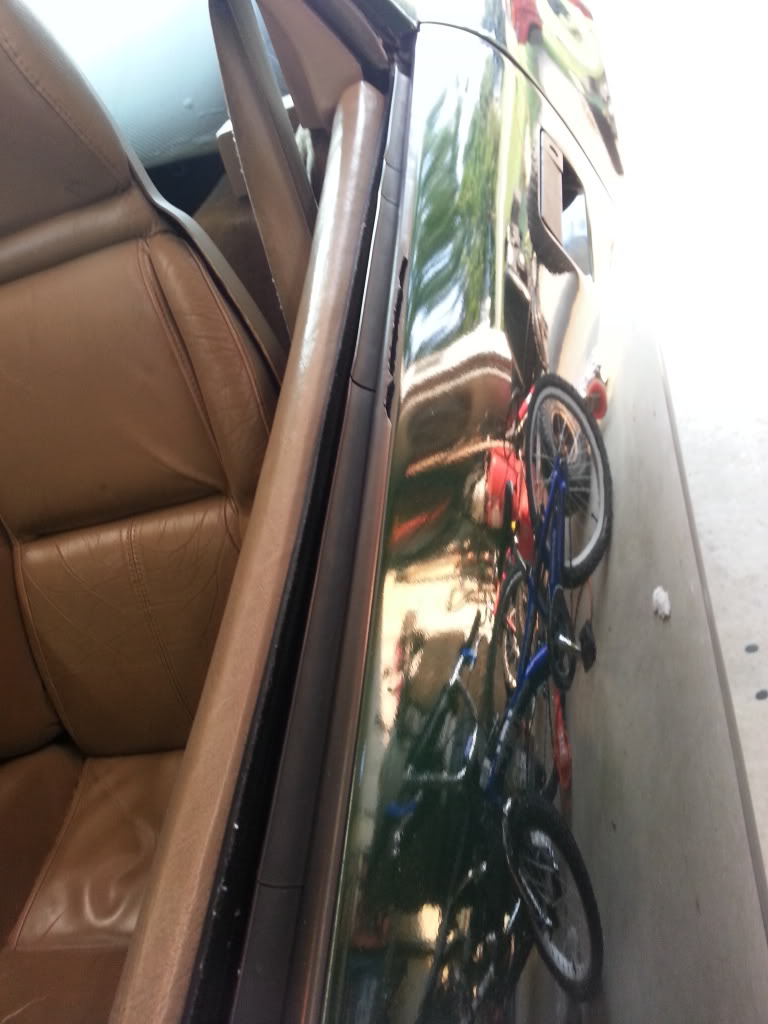
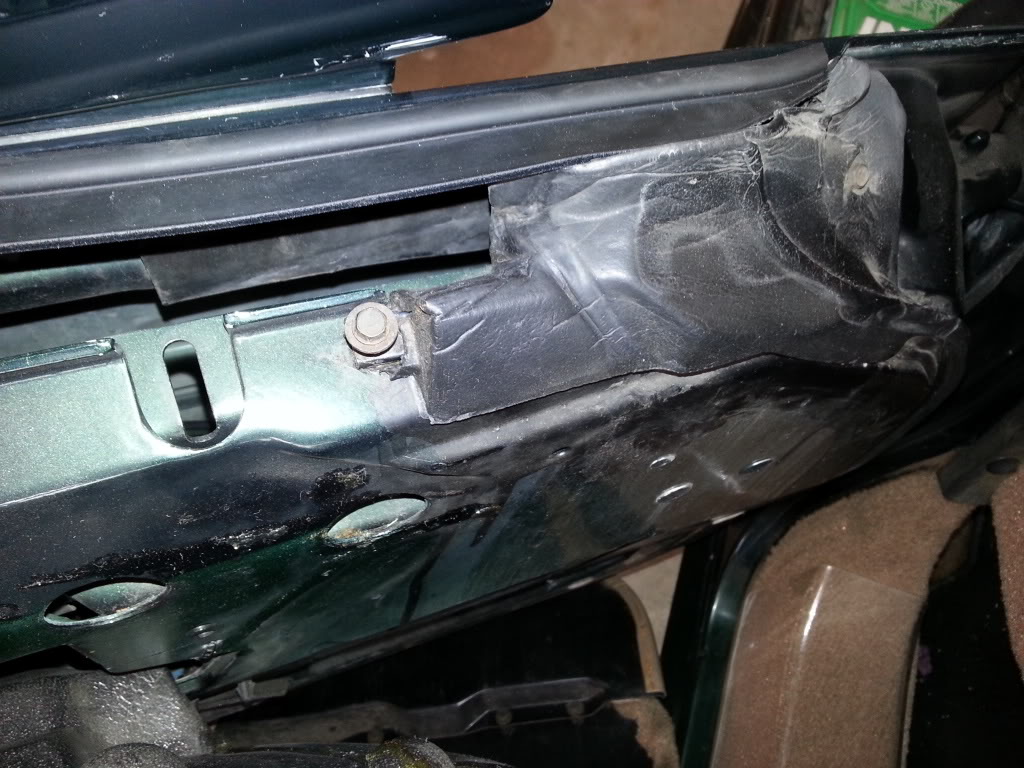
BEFORE
You can see where the seal is cracked badly.
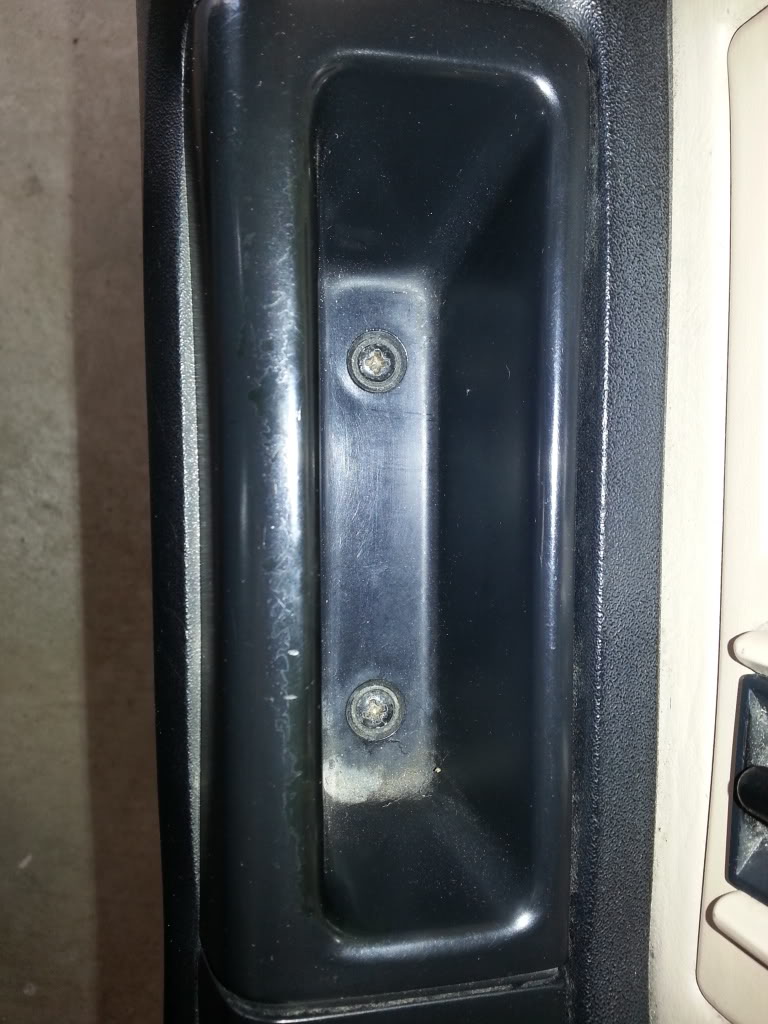
1) Begin removing the door card by removing (2) Phillips screws from the door handle pocket.
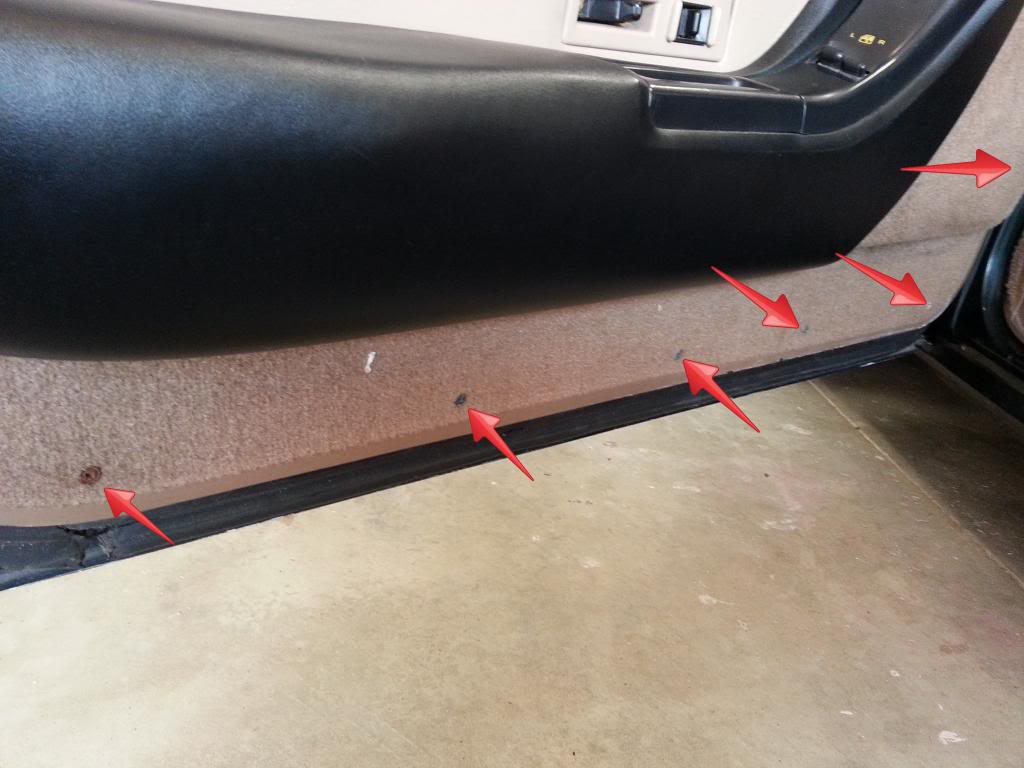
2) Remove (6) Phillips screws from the door card. There are (5) along the bottom and (1) a little higher at the front end of the door.
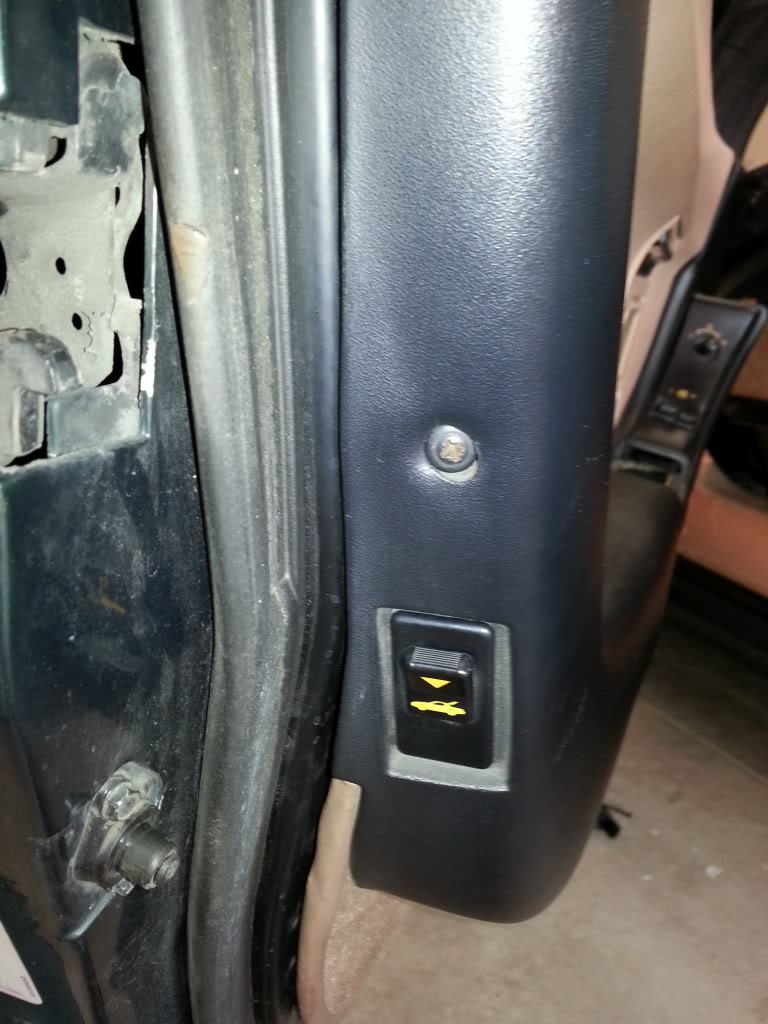
3) Remove (1) Phillips screw on the back side of the door near the hatch release button.
4) Remove (1) Phillips screw from behind the door handle. Then use a flat screw driver and gentle pry out of the light lens. Pry from the top. Be careful small pieces tend to be expense to replace.
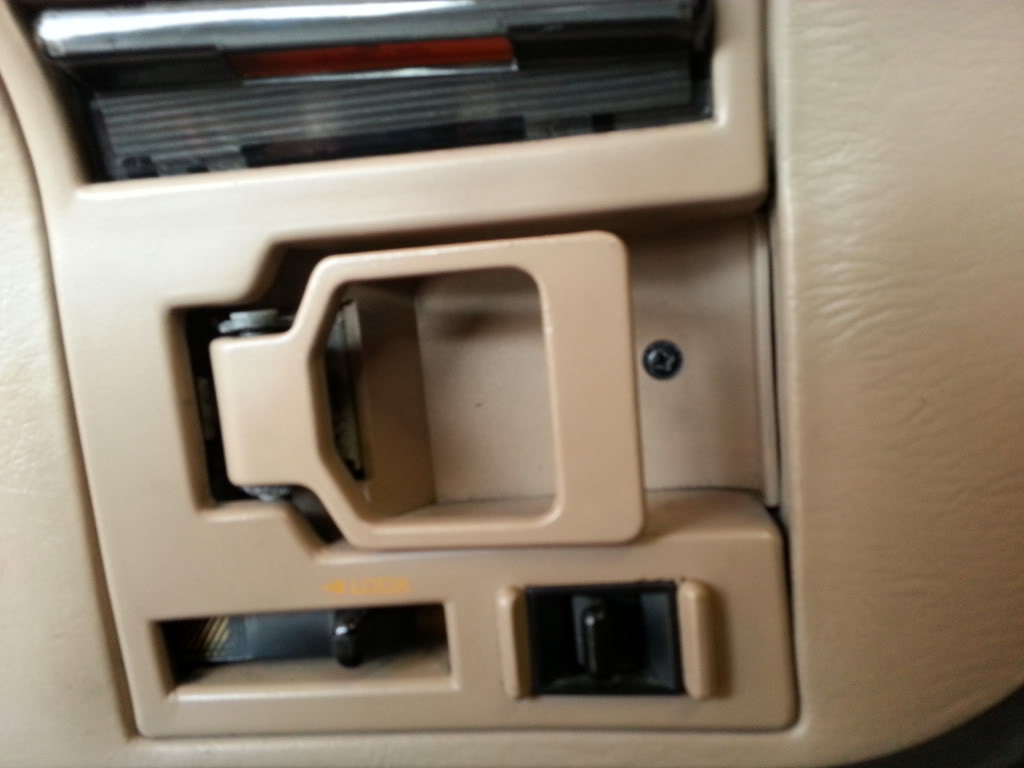
5) Remove (1) Phillips screw hidden behind the light lens.
6) Pry off the door lock slider. Unlock the door. Use a flat screw driver to gently pry the plastic cover off the slider. Remove (1) Phillips screw hidden behind the door lock slider.
7) Carefully remove the door handle "frame."
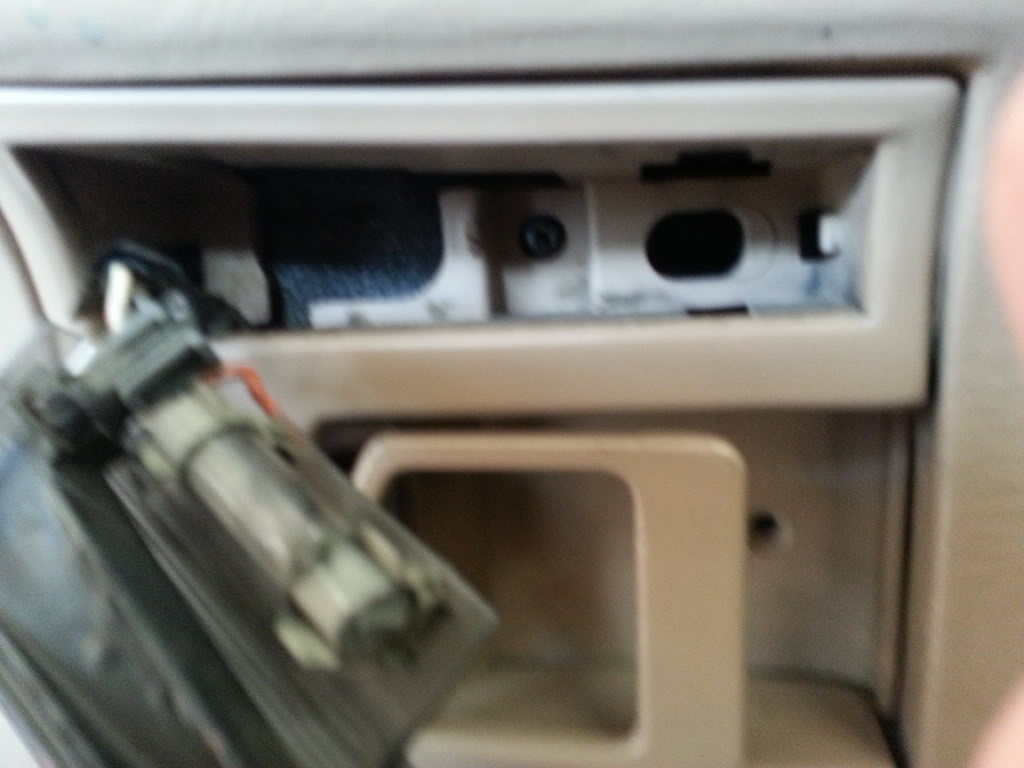
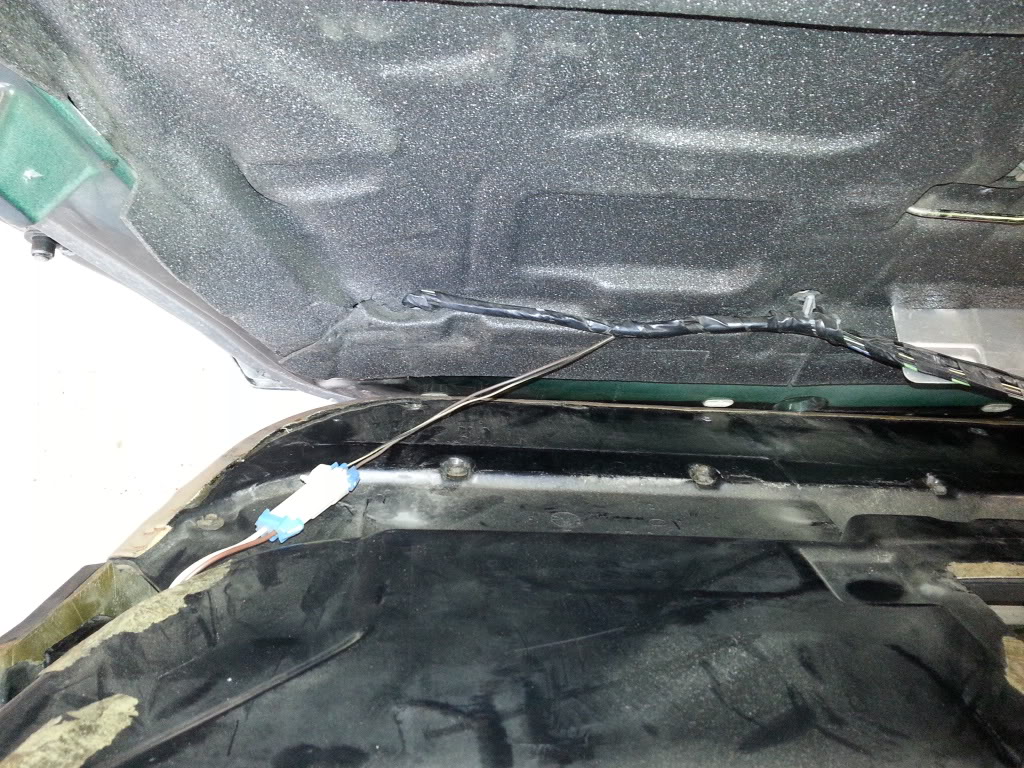
8) Carefully lift and remove the door card. Unplug the wires shown in the photo. Prop the door card is such a way not to damage it.
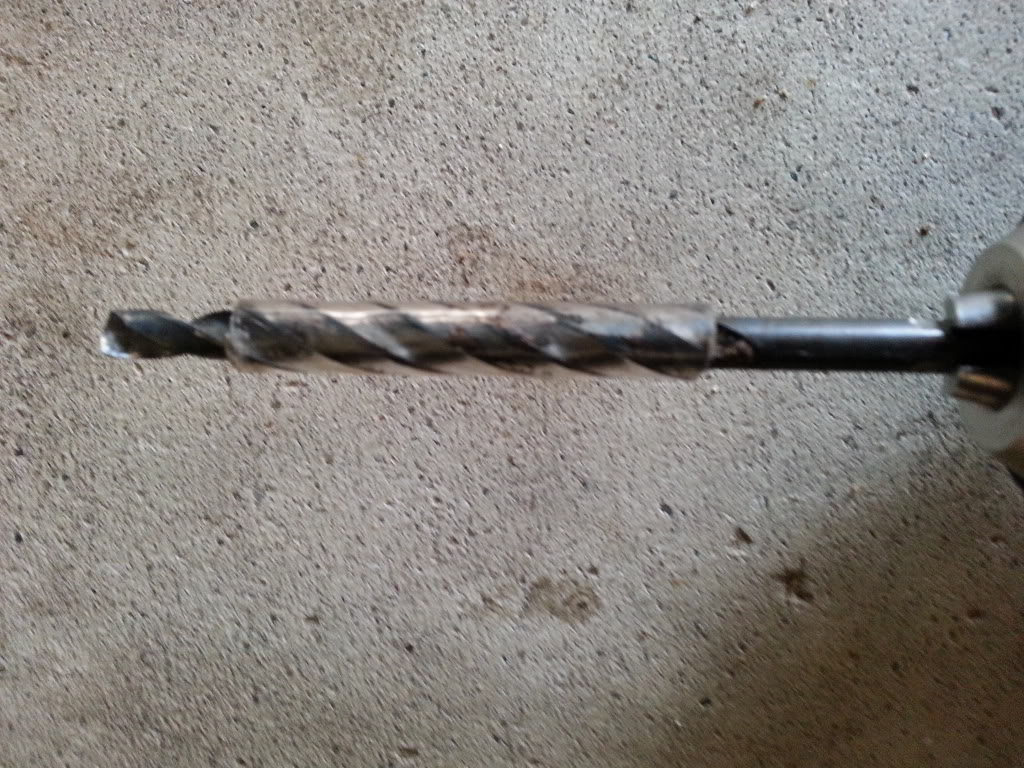
9) Prepare to drill out the (3) pop rivets at the top of the door. I slid a piece of tubing down the drill bit to leave only the tip exposed. This will help protect the door weather stripping near the rivets.
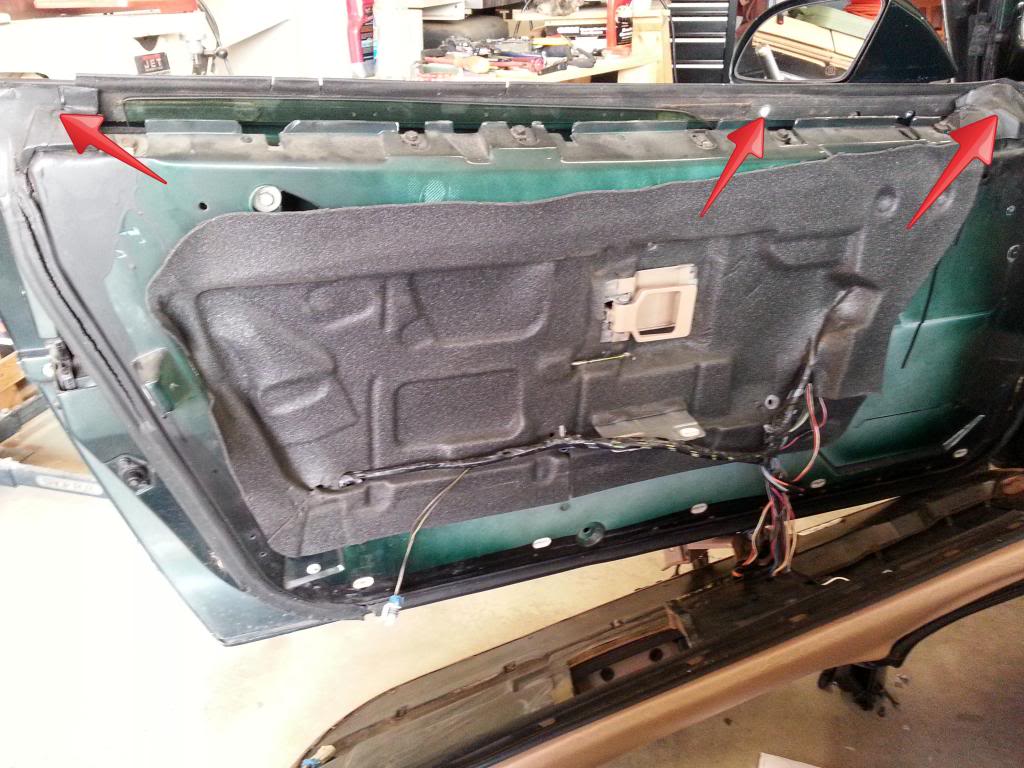
10) Drill out the (3) pop rivets where marked below. (2) are behind the weather-stripping. You might find it help to remove the screws holding the weather-stripping with a 7mm socket. Be careful not to tear the weather-stripping.
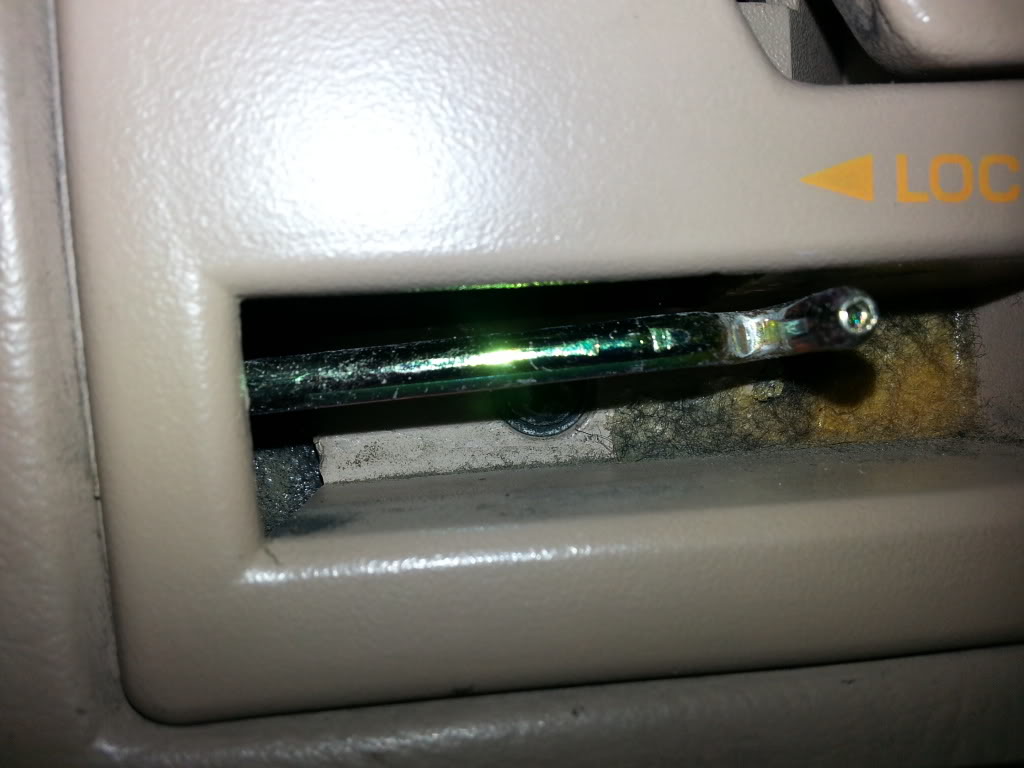
11) Carefully lift the old seal off the door. I pulled the top of the seal towards the car then put a pair of needle-nose pliers to pull straight up. Obviously, be extremely careful as there is paint nearby.
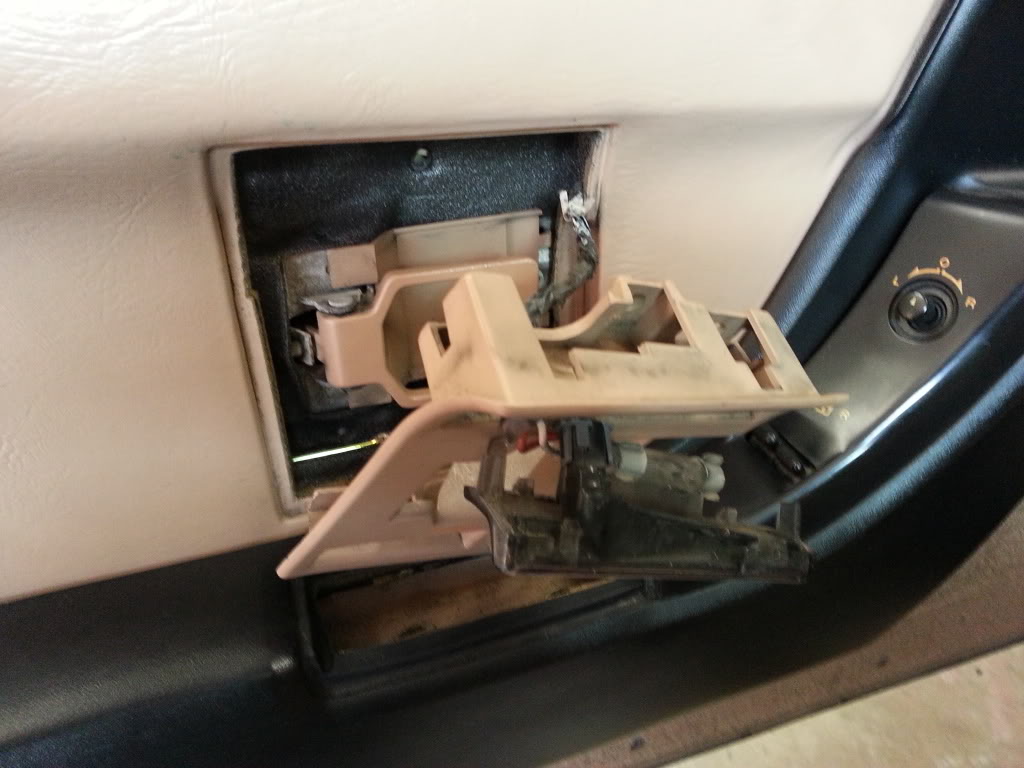
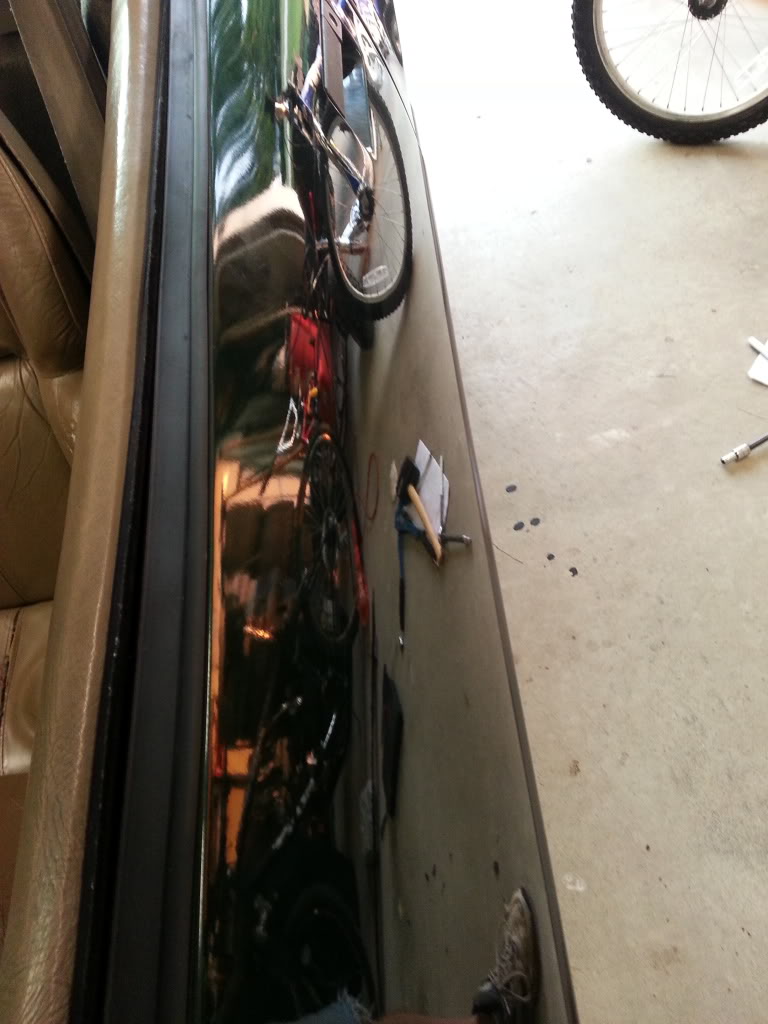
12) Carefully insert the new seal. Be sure to line up the clips. As you insert the seal be sure not to scratch the paint. I started at the front of the door and worked toward the back. Be sure the clips catch. I gently tapped it down with a rubber mallet to be sure the clips were seated.
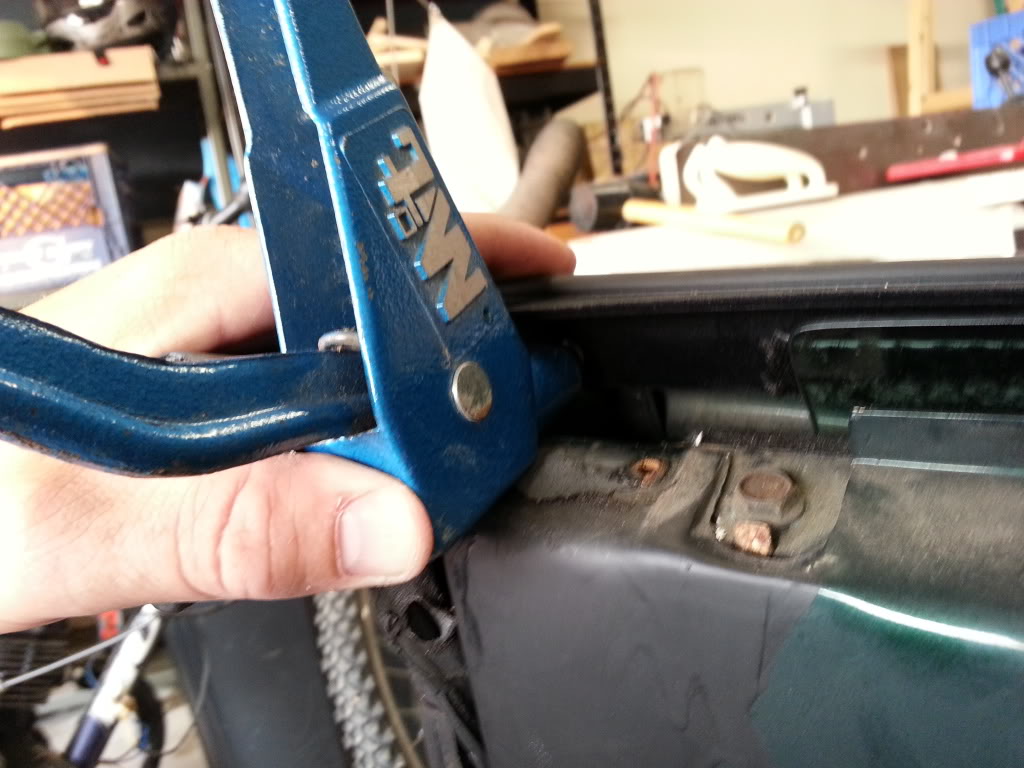
13) With a pop-rivet tool install the (3) rivets.
14) Reinstall the door card. Remember to reconnect the wires behind the card.
Whole process took me about 50 minutes. Passenger side door seal will be similar except there is a hidden screw behind the power window switch on the passenger side.
Let me know if you find this helpful!!!
BEFORE
You can see where the seal is cracked badly.
1) Begin removing the door card by removing (2) Phillips screws from the door handle pocket.
2) Remove (6) Phillips screws from the door card. There are (5) along the bottom and (1) a little higher at the front end of the door.
3) Remove (1) Phillips screw on the back side of the door near the hatch release button.
4) Remove (1) Phillips screw from behind the door handle. Then use a flat screw driver and gentle pry out of the light lens. Pry from the top. Be careful small pieces tend to be expense to replace.
5) Remove (1) Phillips screw hidden behind the light lens.
6) Pry off the door lock slider. Unlock the door. Use a flat screw driver to gently pry the plastic cover off the slider. Remove (1) Phillips screw hidden behind the door lock slider.
7) Carefully remove the door handle "frame."
8) Carefully lift and remove the door card. Unplug the wires shown in the photo. Prop the door card is such a way not to damage it.
9) Prepare to drill out the (3) pop rivets at the top of the door. I slid a piece of tubing down the drill bit to leave only the tip exposed. This will help protect the door weather stripping near the rivets.
10) Drill out the (3) pop rivets where marked below. (2) are behind the weather-stripping. You might find it help to remove the screws holding the weather-stripping with a 7mm socket. Be careful not to tear the weather-stripping.
11) Carefully lift the old seal off the door. I pulled the top of the seal towards the car then put a pair of needle-nose pliers to pull straight up. Obviously, be extremely careful as there is paint nearby.
12) Carefully insert the new seal. Be sure to line up the clips. As you insert the seal be sure not to scratch the paint. I started at the front of the door and worked toward the back. Be sure the clips catch. I gently tapped it down with a rubber mallet to be sure the clips were seated.
13) With a pop-rivet tool install the (3) rivets.
14) Reinstall the door card. Remember to reconnect the wires behind the card.
Whole process took me about 50 minutes. Passenger side door seal will be similar except there is a hidden screw behind the power window switch on the passenger side.
Let me know if you find this helpful!!!
Last edited by ercriss; 08-21-2013 at 08:22 PM. Reason: update photo


Thread
Thread Starter
Forum
Replies
Last Post

